Showing posts with label How-to. Show all posts

How to fix can't connect to network error on Modem/Wifi Dongle and Ethernet.

  •  Troubleshooting: Can't Connect to Network? Here's How to Fix It
  • Introduction: Getting that frustrating "Can't connect to this network" message on your Ethernet or Wi-Fi dongle? Don't worry, we've got you covered. Whether you're using a wired connection or a wireless dongle with an 802.11 chip, we'll walk you through the steps to resolve this issue.
  • Fixing Ethernet Connection Issues:
  • If you're having trouble connecting to the network through your Ethernet cable, follow these simple steps:

  • Click on the computer or network logo located on the right side of your taskbar.

  • Access the "Network and Internet Settings."


  • Navigate to "Change Network Adapter Options."


  • Right-click on your Ethernet adapter and select "Disable."
  • After it's completely disabled, right-click again and choose "Enable."
  • Your network connection should now be reestablished, and the error message should be resolved.
  • Fixing Wi-Fi Dongle Connection Issues:
  • Experiencing connectivity problems with your Wi-Fi dongle or Bluetooth Wi-Fi chip? Here's how you can troubleshoot it:
  • Right-click on the "This PC" icon on your desktop.

  • Click on "Properties."

  • In the middle-right section, click on "Device Manager."
  • Locate "Network Adapters" and click the arrow to expand the list.
  • Double-click on the name of your Wi-Fi dongle.
  • Go to the "Advanced" tab, located at the top of the pop-up window.
  • In the "Property" section, find "Bandwidth."
  • Depending on your current setting:
    • If the value is set to "20_40MHz," select "20MHz only" and click "OK."
    • If the value is set to "20MHz only," select "20_40MHz" and click "OK."
  • Your connectivity issue should now be resolved.
  • Conclusion: No need to panic when faced with network connection problems! Whether you're using an Ethernet cable or a Wi-Fi dongle with an 802.11 chip, these easy steps can help you fix the "Can't connect to this network" error. Remember to disable and enable your Ethernet adapter for wired connections, and for Wi-Fi dongles, adjust the bandwidth settings in the device manager. Stay connected hassle-free!

how to make payoneer account in pakistan

How to Make Payoneer Verified Account in Pakistan

how to create payoneer verified account
If you are Pakistani and looking for How to create a verified Payoneer account then this article is gift for you. Payoneer is the most fast and simple solution use these days for receiving payment worldwide. Most of the freelancer use this system to get payment. Payoneer is accepted in 200+ countries and also accessible more than 150 currencies which making this system most popular worldwide. 

Withdrawal is very easy Payoneer customer can get their ATM Debit / MasterCard  that will allow the customer to withdraw their fund any where form any ATM machine. You can also transfer your fund to any of your wired bank account. You can even link your wired bank account with the Payoneer account. You can also link your Jazz cash account to Payoneer account. Here we are going to explain you this all process in simple steps.

How to Registered Verified Payoneer Account

1. Open Payoneer website and click on register.

2. Now fill your relevant information.

3. You need a email account for this you can use your gmail account and set a Password.

4. Enter your contact details like name of City, Zip Code and Mobile Number. (Always use the actual contact detail because you receive your MasterCard on the same address which you have entered here).

5. Select security questions and their answers ( This will help you in future if you forget your password or you account became locked).

6. Enter CNIC No and click on the order.

7. You will receive email open your gmail account and verify your account.

Congratulation you have created your account successfully now it takes 1 to 2 days in approval and then your card will be shipped. Its takes 3 to 4 weeks to reach to your home address. 

How to Activate Payoneer Card

When you receive your Payoneer MasterCard the process of activation of card starts. Here we are providing you all guidelines about how to active your Payoneer Card.

1. Login to your Payoneer account/

2. Enter User name and password.

3. Click on the Login.

4. Click on the "View your status and activate your card".

5. Click on "Activate".

6. Click on the " Card Activation"

7. Enter card number of 16 digits and choose 4 digits secret pin.

8. Select option "Agree" for cookies policies.

9. Now click on "Activate".

Congratulation now your Payoneer card is activated and its ready to use. You have now Payoneer Debit Master Card which allows you to withdraw funds from any ATM of Bank Alfalah, MCB Bank, Standard Chartered Bank & Faysal Bank.

Linking Payoneer Account with PayPal Account

You have now made your own verified payoneer account but receiving payments for international client or buy things online from many of sites you have to require a PayPal verified account. which is not possible without any UK bank account. Be happy we here you can learn how to link your Payoneer account will PayPal account and enjoy transection between these both account very easily.


Withdraw Funds using Jazzcash Account

Jazz Cash account now also supports transaction through Payoneer. You can easily link your Jazz-Cash account with Payoneer account. It allow you imediately withdraw funds to your mobile account.

Here are the guideline of linking Jazzcash Account with Payoneer Account

1. Go to Your JazzCash Account.

2. On the main page you will see Payoneer . Click on "Payoneer".

3. Click on " Link Account" It will redirect you to Payoneer's Website.

4. Use your user id and password to login.

Congratulation you have linked your Payoneer account with JazzCash account.

Local Bank Transfer from Payoneer Account in Pakistan

You can easily link you wired bank account with the Payoneer account and can easily withdraw funds form your local account directly or with local account ATM card. Process is very simple.

Login to your Payoneer account, Click on the link bank account and enter the all information of your ATM card and bank as require. Funds will be likely available within 2 hours to your account. Now you can withdraw funds in your local currency within minimal price and low charges.

Thanks You !

How to Create Verified PayPal account in Pakistan

How to Create Verified PayPal account in Pakistan

How to make PayPal Account in Pakistan
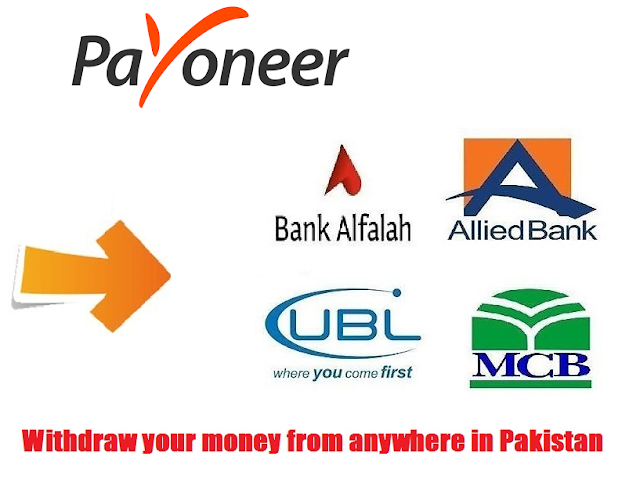
How to withdraw through Pa

Here we are going to tell you how to create PayPal account in Pakistan. PayPal is an international online account system that prove you facility to get payments and money online and also transfer to anybody over the internet. This service is very easy to use and allows an easy way to pay and get payment simply you have require an internet account it avoid any online hassle. This service is very famous in Europe,US and other major countries. 

Now a days PayPal has become one of the major payment method in the online stores and many of online working systems even some of these only allow to get a payment though this service. But the bad thing is that it still not supported in the Pakistan which create a lot of disturbance for the Pakistani users and worker. In this post i am going to share you a technique about how to withdraw money through PayPal account in Pakistan.

How to make paypal account in pakistan

Basic requirement for PayPal Verified Account in Pakistan


2. Verify your PayPal account through Payoneer  (Step by Step help available below)


Step by Step Guideline to create and verified PayPal Account

If you need a business or personal verified account for PayPal (You can use Payoneer account for this purpose, We have divide this whole process into two group for you so that you can easily understand the whole process step by step.
Click on Payoneer if you do not have any Payoneer verified account (Remember its easy and free).

Setting on Payoneer Account :

1. Login into your Payoneer account.

2. In the Payoneer account profile click on the " Receive payment  > My US payment service profile".

3. In the bottom of page you see "Questionnaire" Click on it.

4. In the website portion write skylikes.com or any website you are going to receive your payment.

5. In the description portion you will write advertising or any kind of work you are doing on this website.(job accordingly as applicable on you).

6. You will receive an email saying " Thank you for submitting the US Payment Service Questionnaire. Your US Payment Service is enabled".

7. Your Payoneer account work completed here now you move toward your Paypal Account.

Setting on Paypal Account :

1. Setup PayPal Account "Go to PayPal > Click on Sign up.

2. Sign up simply by using email address and set a password.

3. On the next page fill up your name and address.
(Use your real name in the address type any us state, it's city and zip code for example P-820 LA city Angeles zip code 90001. you can search Zip code etc on the google search.

4. You will receive a email from PayPal "Verify your email address".

5. Now login your PayPal account go to main Profile page under the text "Welcome" click on "unverified". This will open verify account page.

6. On the bank account selection click others and fill up "US Payment Service Account Number and Routing Number Payoneer (Already send you through email while you activating service in the payoneer account).

7. As you completed system will ask you to verify instantly or up to in 2-3 days. You select here 2-3 days.

8.  PayPal will then send two small amount of money to your Payoneer account.

9. As you receive the payment in Payoneer account login to your PayPal account and verify your account by entering exact amount of two small transactions you have already receive.once you have enter the amount you get message you PayPal account is verified.

Congratulation you have now make your Paypal verified account in Pakitan .

Fee / Charges of PayPal on Transaction?

PayPal allow the users to make instant transfer of payment on the charges of 30 cents per transaction and 3% of the total money. Have a best level of account protection as compared to any other competitors. 

Usage, Transaction and History

Most of e-commerce website offers payment option through PayPal. So you can easily shopping over the internet almost all site though your PayPal account.It transfer money instantly you can even transfer money to your wired bank accounts it also takes less than 24 Hours.You can  easily check all your payments transaction history from your account.One of the best feature is disputed transaction so no need to worry if you have not get the same as you ordered as a buyer.

FAQ?

What is PayPal ?
Why We Require a PayPal Account in Pakistan?
Why PayPal not available in Pakistan?
Why we Use PayPal?
Can we use PayPal in Pakistan?
Is PayPal banned in Pakitan?
How to draw money PayPal?

Here we will try to give all these question in short so you can understand the importance of PayPal account in Pakistan. PayPal in an American company. PayPal declined Pakistani Government to initiate its services in Pakistan. whereas Pakistani Government wants to start this service because a lot of Pakistani community offering online freelance services in Pakistan. An a roughly estimate around 2 lac freelancers and 7K registered SMES working in Pakistan. Many of these Pakistani's eel difficultly in transaction whereas PayPal provide online best payment system to all people world-widely.  PayPal enables you to get or send payments to anywhere in the world instantly. They charges a fee in exchange for providing their services like one click transactions and password memory etc.

PayPal has 286 Million active users registered accounts of 25 currencies worldwide and provide services in 202 markets.You can also use PayPal on your Mobile. Android and IOS both app available over the internet. Like the Huge potential of freelance in Pakistan, With PayPal small brands of Pakistan can also sell their products internationally because many of international customers trust and support PayPal account.

With the above statement you can easily understand the important of the PayPal word widely and in Pakistan. Because this system can make very easy to get and pay payment online in the whole word. Its price is very low affordable to many of us and it work very quickly.

PayPal Pro Account

If you are a businessman or you want to sell or buy a lot of things on eBay or online business websites. You also want to get full control over how to checkout money process then we recommend you to create a Pro Business Account. The cost of this account is $30 per month but it make you very save in transaction.

What is Xoom ?

Xoom is a PayPal service that work from the United State, Canada and also more the 131 other countries. It is also operation in the Pakistan. It enable its user to electronically transfer payments and also pay their utility bills and mobile loads.

Conclusion

PayPal is not banned within Pakistan only PayPal does not operate in Pakistan but hopefully it will start services in future.  Before this you can use your Payoneer Debit Master Card to signup and access you PayPal account within Pakistan. Hopefully this article clear a lot of your questions and make it easy to create PayPal account in Pakistan for you. If still any thing remains please write it in the comments we will try to clear all your question right their.

Thanks You!

Part time full time earning websites

 
how to earn online


Best Websites to Earn Online Money


If you are at home having some free time and want to earn some extra cash, here I am going to share with you some to websites giving good payout . Simple methods to join these website. Make your account, spend your extra time and get online money.If you want some quick extra cash, turn to these money-making websites. Making money online has never been easier but if you get a 100% working website or organization which provide you work to do and give payout it became easy for you. Whether you want to do gig to generate part-time income or you want to do some quick extra cash. You have to search over the internet and have to spend time to get a good organization to whom you get registered. To solve your this problem, Here we are going to explain you some of the best websites to make money online:

online 100% working websites


  1. Fiverr.com
  2. Etsy.com
  3. TaskRabbit.com
  4. Wonder.com
  5. ThredUp.com
  6. Swap.com
  7. Gazelle.com
  8. Cardpool.com
  9. OfferUp.com

Its depend on you whether you are looking to get extra income quickly, part time income or collect long-term income, each of these money-making websites offers unique advantages and disadvantages tailored to your needs and interests. Here we are going to explain a short description of all these websites and online businesses if you are interested you can read on more information by going on each of these website and decide which is made for you.

1. Fiverr

According to my research this is a popular website that can be helpful for freelancers who want to work online by staying home. Know something about digital animation? You can work on it for someone and get a reasonable income the only thing you have a computer, a internet connection and a skill. If you do not have any skill yet than you should first get knowledge about any professional skill like graphic designing, SEO, typing and many more than get registered with the said website and search work according to your skill. Better your skill better you earn. Its totally depend on you its 100% trusted website. Many freelancers are working on it from the whole word and get fast cash. Many people work for $5 cash here but you can asked more according to the project and your skill. 

2. Etsy

Are you crafty ? is it. If you are artistic and are artistic type of person who can make custom jewelry or refrigerator magnets with the best of them, Etsy is the market where you can sell your products easily. For the rest of people, you must find another website to go to, so we can earn money to buy things from the crafty entrepreneurs at Etsy.


3. TaskRabbit


If you are willing to get your hands dirty this website is for you (Think about work on someone weeding, work for somebody's garden or cleaning somebody's garage as they desire.) People come to this site to find those some willing to do various tasks for them and they pay for these little tasks, such as putting together a bookcase or running an errand for them and many more. Do as many tasks as you want and earn as much as you can, This site is very good and does not require and specific skill you can go to this site find out the work you can do and get contract. You can easily do it as a part-time or full-time job.

4. Wonder

When someone want to research on any topic they visit on this website. Wonder does not require to hire anyone. They only go through the process about their work according to the website and post it. This takes only five minutes. Now if you think that you can have the skill to do this research you can go to you dashboard select the research and choose simple answer of the questions. The average of these type of research pay between $8 to $16 for each of these research and researcher can easily make almost about $20 by working an hour. In short, wonder provide a good option for the people who want to cash their extra time by doing little tasks over the internet and they have not any specific skill to cash. Its also get fast money on this website.

5. ThredUp

With the tagline of the site "secondhand clothes, firsthand fun", you can easily understand this site it like a online store make for setting your useless clothes online. This e-commerce company make for those people who want to sell their clutter for cash and make money. This online thrift store offers to sells women's and children clothes online and make money. Now we go for how it works, You send your clothes in a ThredUp bag with a mailing label, ThredUp will decide the value of your bag appeals to thrifty types looking to make money and sell their clutter for cash. The online thrift store sells women's and kid's clothes. Here's how it works: You send your clothes in a ThredUp bag with a prepaid mailing label, and ThredUp will decide the value also note that there is a fee if your items are not accepted. They're looking for nice clothes of popular brands. Now if your clothes are good for a yard sale, They hold it for yard sale. ThredUp enables you to sell your unwanted items and make money. For more information visit to the website.

6. Swap

Just like ThredUp, Swap is also an online consignment store. You can send your used clothes and toys games etc. The Swap will receive by them either accepted or rejected. If rejected you have to pay a fee for receiving these items back or you can donate these item. If you items are accepted they will pay 30 percent credit to by something new for you. Get more details by visiting the website if you are interested.

7. Gazelle

This is also a online store but it deals with the electronics items. If you have an old mobile, cellphone, iPad or computer and you want to cell these all old electronics items. This website will offer you cash for your these old devices. If you agree to send you can send packaging materials to their address they will pays the shipping costs and also send you gift card or cash transferred to your PayPal account. You may not make a fortune, but it's better than letting an unused device collect dust on a shelf – and far better for the environment to sell it than toss it in a landfill.

8. Cardpool

This is the most popular site for selling gift cards. Some time you maybe forgot to use the gift cards , you got gift cards last Christmas but now unused, and you don't think you'll ever use them again. Now, tell Cardpool what you have, they'll make you an offer and if you agree, you can exchange it for cash or, ironically, another gift card. Keep in mind, the site only accepts cards with a value of $25 or more (with a cap of $1,000). I think this is the best website for the unused gift cards.


9. OfferUp

It is a selling website which offer you to sell your things online buy placing their picture and mentioned their price. If anyone like you thing he may contact you and see your items and pay you and get the things.

10. Google AdSense


This is the most reliable site I have seen. If you have any blog or YouTube channel you can easily monetize these channel and website/blog. You can cash out you content by monetization its very easy. apply for a google AdSense account if you have not yet. and placed google adds on your website. more the traffic more you earn . its a 100% working original way to earn money over the internet. If you do not have any website or you tube channel. see the topic

how to make a free website/blog

how to create a YouTube channel free


Hopefully this topic help you a lot if you still facing any confusion in your mind you can asked any question regarding online working or regarding par-time full-time jobs in the comments box. We will try to give you answers in the comments box.

Thanks you!

How to Change Email Address of Blogger


How to Change Email Address of Blogger ?

How to Change Owner Ship of a Blogger?

How to Shift Blogger to another Email Address ?

How to Transfer Owner Ship of a Blogger ?

Transfer Blogger to Another Gmail Account


Google Provide best service to create a blogger and its totally free, and you need only a Gmail ID for creating a new blogger.First of All you have a Google Account if you not have Go to Google Server and First make a new ID.

Today over topic is how to transfer a ownership of a blogger.Usually blogger don't permit it directly but still there is a way available by using of which you can easily change your primary email id .There are many reason for what people change login email address of there blogger.

How to Change Email Address of Blogger ?


Some of the possible reasons are following, 

Reason 1 :
Many of new bloggers usually create their blog with a random email id and later on they feel that there blog should have been associated with something that looks more genuine. In case of  that they change their blogger login email address.

Reason 2.:

Some time you have more than one blog and these blogs are attached with different email address, It becomes very difficult task to manage these all accounts.So its a easy way to change the login email id of all blogger to one ID in this way you can manage all your blogs in the same dashboard.

Reason 3:

You have approved  AdSense account of another email id and you want your blog to be associated with that email id.


Simple Steps For Change Email Address of Blogger

Login to your Blogger account for which you want to change your login email id.

Step 1:

Go to Blogger Dashboard ==>  Settings  ==> Basics.


 In Permissions section, you will find the blog authors.


Click on Add Authors button and enter an Email address where you want to transfer owner ship o0f your blogger. It will send an author invite to the new email address which you want to switch to.

Step 2:

Now login to your second email address.You would have received an author invitation in your second email address. Now accept it.

Step 3:

When you accepted the invitation. (In this step your second email address is added as a author not as a admin)

Step 4:

 Now Login to blogger with the old Email id, you will see the other email address as a new author. Change the role of new email address from Author to Admin.


Step 5:

The last step. Login to blogger account from your new  email address. You will see the blog in your dashboard with Admin power.

Go to Settings ==> Basic and remove the old email address from the Blog Authors from Permission.

Thats all ! 

I hope you will enjoy our post . Please write you comments if it is help full for you.

Submit Blogger Sitemap To Google Webmaster Tool


How to Submit Blogger Sitemap To Google Webmaster Tools?

Today our topic is about submitting of sitemap to google webmaster tools for better crawl of your site.For the successful blogging career everyone must have to generate decent organic traffic to his blog.Today we are going to tell you a easiest way to submit your blogger sitemap to google webmaster tools for the purpose of gaining more traffic.

Webmaster is a great tool provided by google itself.specilly use for submitte your website or blogger index to the Google and it always help in imporving the crawling rate of a website or blogger.For submitting sitemap you just need to verify your ownership of website to google webmaster tools and then submit a simple sitemap. In the term SEO submittion of sitemap is very important.


How to Create and Submit Sitemap to Google Webmaster Tool
Submit Blogger Sitemap To Google Webmaster Tool

Following are the easy steps you have to adopt in submission of sitemap to Google Webmaster tool


Steps for Adding Your blogger in the Google Webmaster Tools

Step 1:


Login to Google Webmaster Tools with your G-mail ID


Give the user id password here


Step 2:

After login click on the ADD PROPERTY button for linking your blog or website with google webmaster tool


 In the next windows enter the URL of your website or blog as shown bellow

Step 3:

Here a new windows will be opened asking you for verifying your domain. Many option available here for you to verify your website or blogger.


Copy the code login your blog click on ==> "Template"  ==>  "Edit HTML"


Past codes after the <HEAD> in the HTML codes of blog and click on the verify button in the Google webmaster tools.
You will see the following massage after verifying.


Click on Continue

Steps For Sending Blogger Sitemap in the Google Webmaster Tools


Step 1:

After Login your webmaster tools account with your G-mail ID,Click on view all and than click on the your website or blogger name as shown in the picture


Step 2:

Click on the Sitmaps as shown in the picture


Step 4:

Click on the ADD/Test Sitemap button


Step 5:

As you click on the ADD/Test Sitemap button, a new box will be opened as shown in the picture.
Add the below code in the text field.


Codes:

atom.xml?redirect=false&start-index=1&max-results=500

Step 6:

Now press on "Submit" Button.
once refresh the page.

Thats All !

The submission process of the sitemap is completed now

Important Note : This sitemap will be work only for those blogs which have only 500 posts.If your blogger have more than 500 post than you do the same process once again and this time enter the code

atom.xml?redirect=false&start-index=501&max-results=1000


Here i explain you one more thing sitemap have two formats on is XML (used by the search engines to find easily contents of blog) and second format is HTML (use for our blog readers so that reader can read all blogs post easily at one place.

Thanks a lot !
If you thing this post is helpfull for you share it with your friends and if you still feel any problem you can ask in the comments.

add border frame to text in post


How to Add Borders / Frames Around the Text in the Post

Today I am going to tell you the easiest way to add border around the text in the post .You can add Text frame any where in you post as you like.

Steps:

1.   While writing you post click on HTML tab

border or frame round the text in post


2.   Past the code for border or text frame.

how to add text box in blog

Codes:-


<div style="
border: solid 5px #aaaaaa;
background: #FF93E7;
font-size: 18px;
margin: 40px;
padding: 30px;
text-align: justify;
">
Type Your Text Here
</div>
The Text Line After the Border.


When you click on Compose tab to see how it look like in the post it will look like this.
Type Your Text Here
The Text Line After the Border.


Note:
              You can change border, background, font-size, margin,padding,text align,any thing you want only by changing the volue for example if you want to change font size to large size change 18px to 20px or 24px or as you like.
If you not want to give background color only delete the background entry.


Examples with Codes:


<div style="
border: solid 10px #aaaaaa;
font-size: 18px;
margin: 40px;
padding: 30px;
text-align: justify;
">
Type Your Text Here
</div>
<div style="
border: dashed 5px #aaaaaa;
font-size: 18px;
margin: 40px;
padding: 30px;
text-align: justify;
">
Type Your Text Here
</div>
<div style="
border: dotted 5px #aaaaaa;
font-size: 18px;
margin: 40px;
padding: 30px;
text-align: justify;
">
Type Your Text Here
</div>
<div style="
border: solid 5px #aaaaaa;
font-size: 18px;
margin: 40px;
padding: 30px;
text-align: justify;
">
Type Your Text Here
</div>
<div style="
border: groove 5px #aaaaaa;
font-size: 18px;
margin: 40px;
padding: 30px;
text-align: justify;
">
Type Your Text Here
</div>
<div style="
border: ridge 5px #aaaaaa;
font-size: 18px;
margin: 40px;
padding: 30px;
text-align: justify;
">
Type Your Text Here
</div>
<div style="
border: double 5px #aaaaaa;
font-size: 18px;
margin: 40px;
padding: 30px;
text-align: justify;
">
Type Your Text Here
</div>
<div style="
border: inset 5px #aaaaaa;
font-size: 18px;
margin: 40px;
padding: 30px;
text-align: justify;
">
Type Your Text Here
</div>

This post is for you if you are a blogger and looking for text border to impliment on your blog.

thanks a lot.

How To Fix 3G 4G iphone6

How To Fix 3G / 4G Not Working On iPhone 6 or iPhone 6 Plus

This post is about fixing of 3G / 4G Problems on iPhone6 or iPhone 6 Plus. We hope You are much excited on getting a new phone like iPhone 6 or iPhone 6 Plus because by holding this  device giving many edge to its owner on other smartphones. It has a lots of new features, some users reported that they are facing issues about camera application which is getting freezes and unresponsive on touch screen but the main issue faced by many of its users is that 3G and LTE are not working on iPhone 6 and iPhone 6 Plus device. Here we are providing you a complete guide having very simple steps by using of which you can easily resolve this issue. If you a still facing any problem you are always welcome in comments.


Method 1: First of All Check Your Cellular Connection


Open Settings App  == >  Mobile

Turn off / on these setting few times to solve this issue

Method 2: Switch your Phone to Airplane Mode


Open Settings App == > Airplane Mode

Turn-on the Airplane Mode and then after a few seconds turn-off it again which might solve the 3G or 4G connectivity issue

Method 3: Removed Sim Cards and Than Reboot The Phone


Turn-off your iPhone

Remove the SIM card and then insert it again

Hard reset your iPhone 6 by press and holding down sleep/wake buttons together


Method 4: Turn Off The Phone Sim Pin


Open Settings App == >  Phone == >  Switch-off the SIM PIN

Because sometime people accidentally enabled this option on the device, which is normally used to prevent access to cellular data network while some carriers enabled the SIM PIN by default, so you have to contact your carrier to check whether it this setting is on or off.

Method 5:  Reset Phone Network Settings

If problem is not solved by resetting the phone then reset Phone Network setting because many of the network related issued solved by reset network settings.Please be aware that it will clear your existing Wi-Fi and cellular settings, which includes Wi-Fi passwords, saved networks and also the VPN settings etc, so you have to configure these networks settings again. For doing this:


  • Open Settings app
  • Go-to the General == > Reset option
  • Tap the option “Reset Network Settings“
  • A pop-up message will appear for confirmation just tap on to "Reset Network Settings" to carry on
  • Your device will reboot.

Method 6: Get Latest of IOS Firmware for your Phone


Usually this problem only occurs when the device’s firmware is not updated, so to apply a firmware update just navigate to “Settings" ==> "General" ==> "Software update” and get the latest firmware of your device.

If all the above Methods fail to solve the problem of 3G/4G then 

(Restore via iTunes)


If none of all above method works for you which is usually not happened but in your case if no method is working in your device than go to iTunes and restore your device completely using iTunes .

Note :-  All your device data and settings will be erased. 

To do this just


  • Connect your device with your computer and launch iTunes
  • Click on your device and hit the Restore button which will restore your device just hang on until the process is completed.

I hope this post will help you to resolve 3G & 4G issue on your iPhone 6 or iPhone 6 Plus, if you apply these methods properly. But if the issue is not solved with all these methods then definitely your device have some hardware issues so go to the vendor for warranty claim or repairing of your device.

Labels